Tuesday, June 22, 2010

Dining Room Murals

I think these really work when done right. To me, that means the softer the better, the more serene the better, and the subtlest of tones and landscapes.

Not sure they work as well in kids' rooms, or kitchens, or anywhere else. Maybe because it's great to think of being in a dream or being outside while dining? Gives you something to look at in a larger room? In any event, hard to argue that these aren't lovely! I think the last one may even be my favorite.


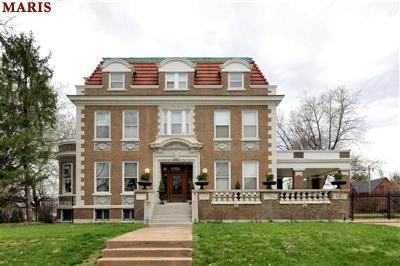
THIS IS MY HOUSE!

This isn't really my house. This is the house I WANT. 1.1 acres, 3,500 square feet in Frontenac. I cannot for the life of me explain why this house has been on the market for a year. Originally listed at $1.2m, it's now down to $995,000. Way out of my league of course, but what's the deal? Who doesn't want this house? I saw it before the renovation (it was actually just sitting there open, unlocked, and we walked in!) and it was listed at $400k clearly as bank-owned, because the owners had taken the fixtures and everything. Beautiful bones, great lot, etc. Obviously, they hit the ball out of the park on the renovation. So why isn't it selling? I guess it's the fact that it's 3 bedrooms and too close to the highway...but I think I could live with that!


Monday, June 21, 2010

DIY Project - Bookcovers

I was tired of the crazy look that a mismatched bunch of books gave in my guest bedroom, which has built-in bookshelves. I tried to dress it up with additional decor, but then realized it was the books that needed a makeover.

For this project, I bought plain, unbleached cotton fabric from Jo-Anns at $2 a yard. You will use a lot if you have a lot of books, so while linen sounds lovely, consider your budget! Then I just cut the fabric to match each book, and glued in the insides.

For a little extra touch, I did a Citra-Solv transfer of images (from The Graphics Fairy, http://graphicsfairy.blogspot.com/) onto the front of some of the books. I just picked some of my favorites!

I don't have a before picture for this, but trust me, it's an improvement!


DIY Art


For this project, I downloaded one of the many free downloads from The Graphics Fairy (http://graphicsfairy.blogspot.com/), and did the Citra-Solv transfer onto plain cotton. Then, I cut that out, and put it on a slightly larger piece of burlap fabric, followed by a french ticking fabric.

The frame and mat I purchased at Hobby Lobby for $25 - total project cost of $30!

Any image you have will work with the Citra-Solv transfer process if you have a toner-based copy made - you could even do pictures of your kids!

Buttercream Icing Recipe

This recipe makes a GREAT tasting, bakery quality buttercream icing recipe. I went to the local bakery and asked them what they put in theirs - it's the trifecta of ingredients: butter flavoring, almond flavoring, and vanilla flavoring (pure vanilla). You need all three!

Makes about 3 ½ pounds

2 sticks butter, room temperature
2 cups Crisco shortening
1 teaspoon butter flavoring (Wilton’s makes the best flavored version)
1 teaspoon pure vanilla extract (I use Wilton’s Clear Vanilla)
1/2 teaspoon almond extract
2 pounds powdered (confectioners) cane sugar
1/2 teaspoon salt
1 tablespoon meringue powder (optional but the texture will be smoother)*
Water as necessary (I usually add about 2 tablespoons but you may need more or less depending on the humidity in your neighborhood)


* You can purchase meringue powder at your local grocery store under the brand name of Just Whites, or at Michael's (they carry the Wilton brand).

In the mixer, mix butter, Crisco shortening, and salt together to incorporate, about 5 minutes on low.

Add almond, butter and vanilla extracts. Mix together well. Add about 1 pound of powdered sugar and the meringue powder and mix.

Add 1/2 cup of powdered sugar at a time and mix until you get the consistency you want.

Add a little milk, a teaspoon at a time, if necessary to thin the frosting. Blend well on low for several minutes.

Use immediately or cover and refrigerate. NOTE: Buttercream Icing will last for weeks as long as it is well sealed.

Enjoy!

Marshmallow Fondant Recipe

This is an easy and VERY tasty recipe! I used this for the Baby Shower Cake and everyone thought it tasted great!

Ingredients:

16 ounces white mini-marshmallows (use a good quality brand)

2 to 5 tablespoons water

2 pounds icing sugar (please use C&H Cane Powdered Sugar for the best results)

1/2 cup Crisco shortening (you will be digging into it so place in a very easily accessed bowl)

Melt marshmallows and 2 tablespoons of water in a microwave or double boiler: Put the bowl in the microwave for 30 seconds, open microwave and stir, back in microwave for 30 seconds more, open microwave and stir again, and continue doing this until melted. It usually takes about 2 1/2 minutes total. Place 3/4 of the powdered sugar on the top of the melted marshmallow mix.

Now grease your hands GENEROUSLY (palms, backs, and in between fingers), then heavily grease the counter you will be using and dump the bowl of marshmallow/sugar mixture in the middle.

Start kneading like you would bread dough. You will immediately see why you have greased your hands. At this stage, you will swear this is a huge mistake, but hang in there!

Keep kneading, it will continue to be VERY stickey. Add the rest of the powdered sugar and knead some more. Re-grease your hands and counter when the fondant starts sticking. If the mix is tearing easily, it is to dry, so add water (about 1/2 tablespoon at a time and then knead it in). It usually takes me about 8 minutes to get a firm smooth elastic ball so that it will stretch without tearing when you apply it to the cake.

It is best if you can let it sit, double wrapped (in saran wrap), overnight (but you can use it right away if there are no tiny bits of dry powdered sugar). If you do see them, you will need to knead and maybe add a few more drops of water.

Prepare the fondant icing for storing by coating it with a good layer of Crisco shortening, wrap in a plastic-type wrap product and then put it in a re-sealable or Ziploc bag. Squeeze out as much air as possible.

This marshmallow fondant icing will hold very well in the refrigerator for weeks. Take advantage of the fact that this fondant icing can be prepared well in advance!

St. Louis Architecture - Meet Me in St. Louis

If you’ve never been to St. Louis, let me tell you – St. Louis has some of the most amazing architecture of any U.S. city. The homes are no exception – many of the homes are solid stone and brick, and there are hundreds for sale in the city of St. Louis alone.

Luckily, many of them are still standing, though they could use anything from mild to total rehabs.

Yeah, you can buy a 5,000 square foot house in Chesterfield, complete with three sides of siding (blech!), a two-story foyer, and columns out front. The McMansion. Reminds me of the front view of Ricky Bobby’s house in Talledega Nights. Circle drive, Hummer out front…you get it.

Sally Benson, the author of "Meet Me in St. Louis," based the story on her family and their 11-room home at 5135 Kensington Ave. The house fell into disrepair in the 1950s on, and in 1994, it was torn down completely. It's a vacant lot now; there are many boarded-up houses nearby. Just a tragedy, really. Someone (actually, many people) had the opportunity to buy THE house that inspired the great book and musical, and…no takers? Nobody?

Here is the MGM backlot setup of 5135 Kensington. Unfortuantely the movie wasn't shot on location in St. Louis!


Now, unfortunately, here is what a house on Kensington looks like:


Sold for $24,000 in 2009, too.

The big problem in the city of St. Louis is urban sprawl. People find living in the city unappealing for many reasons I won’t get into here (yes, some of them involve crime, less than desirable schools, and wanting to surround themselves with people JUST LIKE THEM!). Okay I’ve said my piece on that…

125 years ago, St. Louis was the third largest city in the country. The neighborhoods of the Central West End, Lafayette Square, Compton Heights and so forth were desirable. But then, white flight took over. Fifty years ago, St. Louis proper (I mean the city) had 850,000 residents. Now, about 300,000.

In full disclaimer we recently moved from the city to a nearby area just outside city limits but one day, we just might move back.

What does that open up? Hundreds of beautiful homes, ready for the taking. Let's take a look at some of the houses available right now in the 63104 and 63108 zip codes...


Compton Heights, St. Louis

The Compton Heights neighborhood is located in the south city portion of St. Louis city. The neighborhood is one of the earliest planned residential developments of the American nineteenth century. The neighborhood plan was laid out in 1889 with a view that nature should be incorporated into the architecture. The neighborhood boasts more than 200 homes and is a national historic district.

I am always looking at the homes for sale in Compton Heights, not because we’re really going to move there, but I love the idea that a house this spectacular can run you less than a million (the homes here run about $800K and are on the market right now)!

Unfortunately, the surrounding areas are not desirable in some aspects, which deters people with young kids from living in this otherwise remarkable neighborhood.

Enjoy - except for the second picture. Why is there a dog sprawled out all over the rug? Is that dog dead???


Grasscloth Wallpaper

I first noticed this look a the Ralph Lauren Polo four-story store on Michigan Avenue in Chicago about 10 years ago. Same wallcovering at some of the other Polo stores. I think this could work so many places - den, entranceway, and I hope, in my master bedroom!

It especially seems to work with white trim and darker floors. Yum!


The White House Master Bedroom

I love watching the transformation of the White House master bedroom through the years. Haven’t seen what the Obamas have done to the joint yet, but I bet it’s pretty cool.

Here is the bedroom in 1893. Wow. Very austere, and somewhat odd placement of furniture. And separate beds!


Fast forward to 1911. Major overhaul here, with so much more light and grandeur. I love the mirror over the fireplace, which really anchors the room. I also like the differing colors inside vs. outside the mouldings. The sheer height of the ceiling requires some detail there, probably. Also notice the hodge-podge of pictures around the fireplace – sort of adds a homey feel to the otherwise fancy room. In any event, it does look like someone actually lives here now!


Another 45 years later, here we see the master bedroom in 1958. Yikes! This room isn’t doing much for me – the windows are totally covered, the furniture is very blah, and the matching curtains and bedspread look uninviting – starting to look like a bad hotel room. Wall color and carpet don’t do much either to help the cause.


Just a few years later, Jackie moves in. Jackie undertook a wholesale updating of the White House which must have been a total joy for her. Hard to express why this room “works” so much more than the picture from 1958, but it does, doesn’t it? Beautiful framed pictures over the fireplace, but in simple frames. None of the furniture matches, but it goes together in a comfortable way that is very livable. Note that he chandelier, chair in the corner, bedspread, corner chair, table lamps, curtains, and mats of the pictures over the fireplace all feature shares of teal, but not the exact same shade. The white walls actually work and brighten the place, and the rug is really extraordinary.

A feature that screams Jackie is the piles of books on the ottoman against the bed. And, of course, the professional sketch of young Caroline above the dresser.


Here we are in 1977 – Betty Ford on her way out the door on Jimmy Carter’s inauguration day. Well, a lot of the personal style seems to have given way to formality and again, the bad hotel room vibe. Goo.


The Reagan bedroom in 1981-1992 is a pleasant surprise. The walls are whimsical and make the room bright and sunny. The greenery really brings the room together in a nice way. Check out the two secret doors!